

MCP server
Let tools such as Claude Code, the Claude app, Codex and Cursor work with your community, with limits you set and a log of everything they do.
An AI agent is a tool you run yourself, such as Claude Code, the Claude app, Codex or Cursor, that can connect to CEEJAY and ask about your community the way you would. This page is where an admin connects agents, decides what they may do, and sees what they have done. It is separate from the CEEJAY assistant inside your dashboard.
What you see
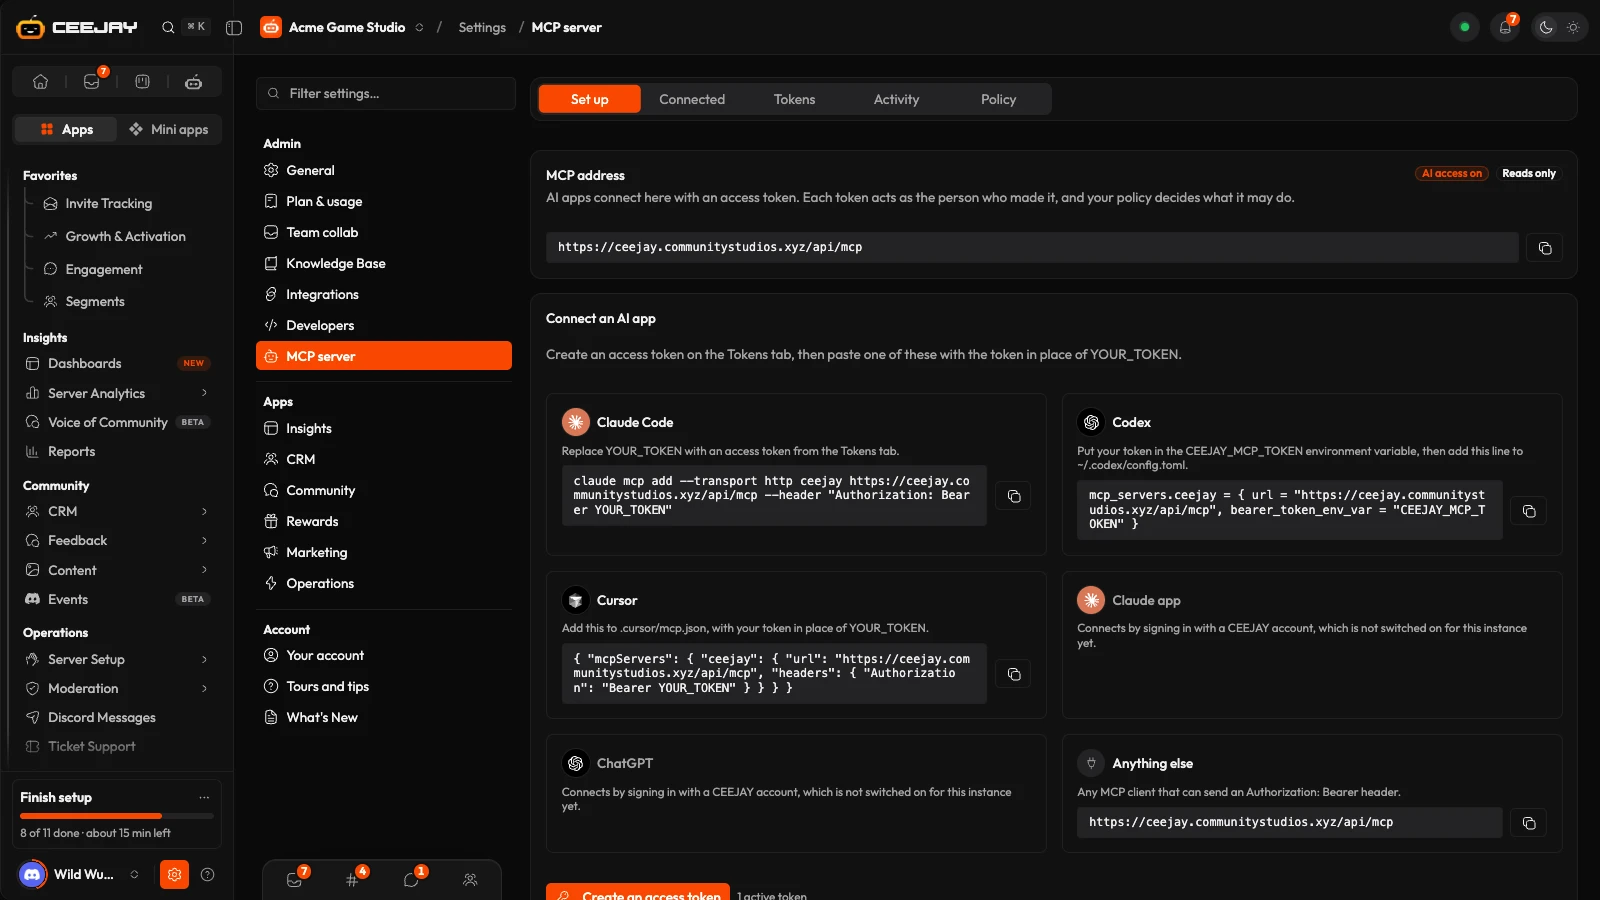
Go to Settings → MCP server. The page has five tabs.
- Set up: your community's MCP address with a copy button, two badges (AI access on or AI access off, and Read-only or Read and write), the exact line to paste for each AI app with its logo, and Last request.
- Connected: AI apps that signed in with a CEEJAY account, with what each may do, when it was approved and last used, and a bin button that disconnects it.
- Tokens: access tokens for scripts and automated jobs that cannot sign in through a browser.
- Activity: every call an agent has made.
- Policy: the limits for the whole community.
Three limits apply to every agent
An agent can do something only when all three agree:
- Your Policy for this community.
- What that agent's own sign-in or token was given when it was approved.
- What the person behind it can see in CEEJAY. An agent acts as the person who approved it, and never sees more than they can.
So a narrow approval or a strict policy always wins, and turning something off on Policy applies to agents that are already connected.
Connect an AI app
Which of the two ways below you see depends on how CEEJAY is configured for your community. The Set up tab tells you.
On Set up, find your tool and copy its line. Claude Code, the Claude app, ChatGPT, Codex and Cursor each have their own instructions. If you see Create an access token on this tab instead, agent sign-in is not set up for you: use the token steps further down.
Paste it into your tool. The first time the agent connects, your browser opens a CEEJAY page saying the agent wants to connect. Under Which communities, tick the communities it may reach. Under Permissions, Read analytics and community health and Read members, tickets and the knowledge base start on, and Make dashboard changes and drafts starts off. Switch each one on or off as you want it.
Press Allow, or Deny to refuse. An approved agent appears on the Connected tab. Each community's own Policy still applies, whatever you ticked.
For scripts and automated jobs, or if your community uses tokens:
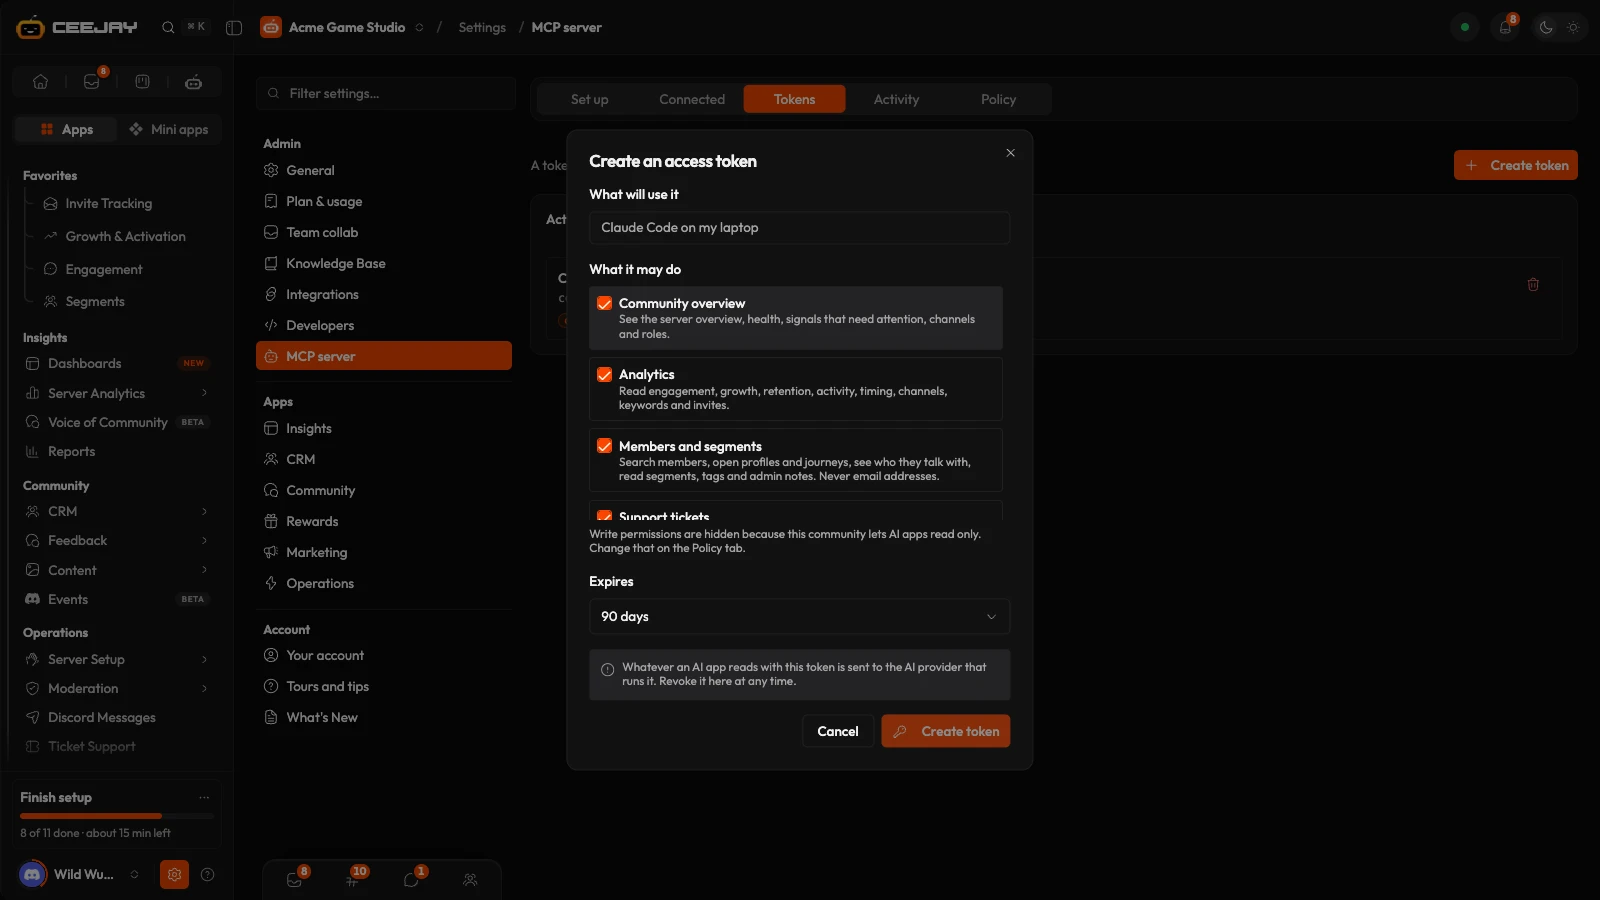
Open Tokens and press Create token. Give it a name under Token name, tick what it may do under Permissions (each permission explains itself), and choose when it Expires: 30 days, 90 days, 1 year or no expiry.
Copy the token the moment it appears. CEEJAY shows it once and cannot show it again. Then paste it where the Set up tab says YOUR_TOKEN, or send it as a bearer token from your own script. The developer docs show how.
What agents can read
These are the read permissions on Policy and in the token window. No agent can read anything that is not ticked on Policy.
- Community overview: the server overview, health, signals that need attention, channels and roles.
- Analytics: engagement, growth, retention, activity, timing, channels, keywords and invites.
- Members and segments: search members, open profiles and journeys, see who they talk with, and read segments, tags and admin notes. Never email addresses.
- Support tickets: list tickets and read their transcripts.
- Polls, giveaways and events: list polls, giveaways, forms, suggestions and calendar events with their status.
- Automations: list automations, their triggers and whether they are running.
- Reports: list saved reports and read what is in them.
- Knowledge base: search the knowledge base and answered questions.
What agents can change
Agents start out read-only. The Let AI apps make dashboard changes and drafts switch on Policy is off until an admin turns it on, and the Set up badge then reads Read and write. These permissions appear under it:
- Update signals: acknowledge, resolve or dismiss signals.
- Tag members and write notes: add or remove member tags and add admin notes in the dashboard.
- Draft messages: save messages as drafts in Magic Messages. Someone in your team sends or schedules them.
- Draft polls and giveaways, add events: save polls and giveaways as drafts for someone to send, and add events to the calendar.
Agents change the dashboard only. Nothing is posted in Discord until someone in your team sends it, and an agent asks you to approve each change before it is applied. There is no permission that lets an agent run database queries, search the text of members' messages, post in Discord, close tickets, switch automations on or off, or delete members, segments or reports.
Policy
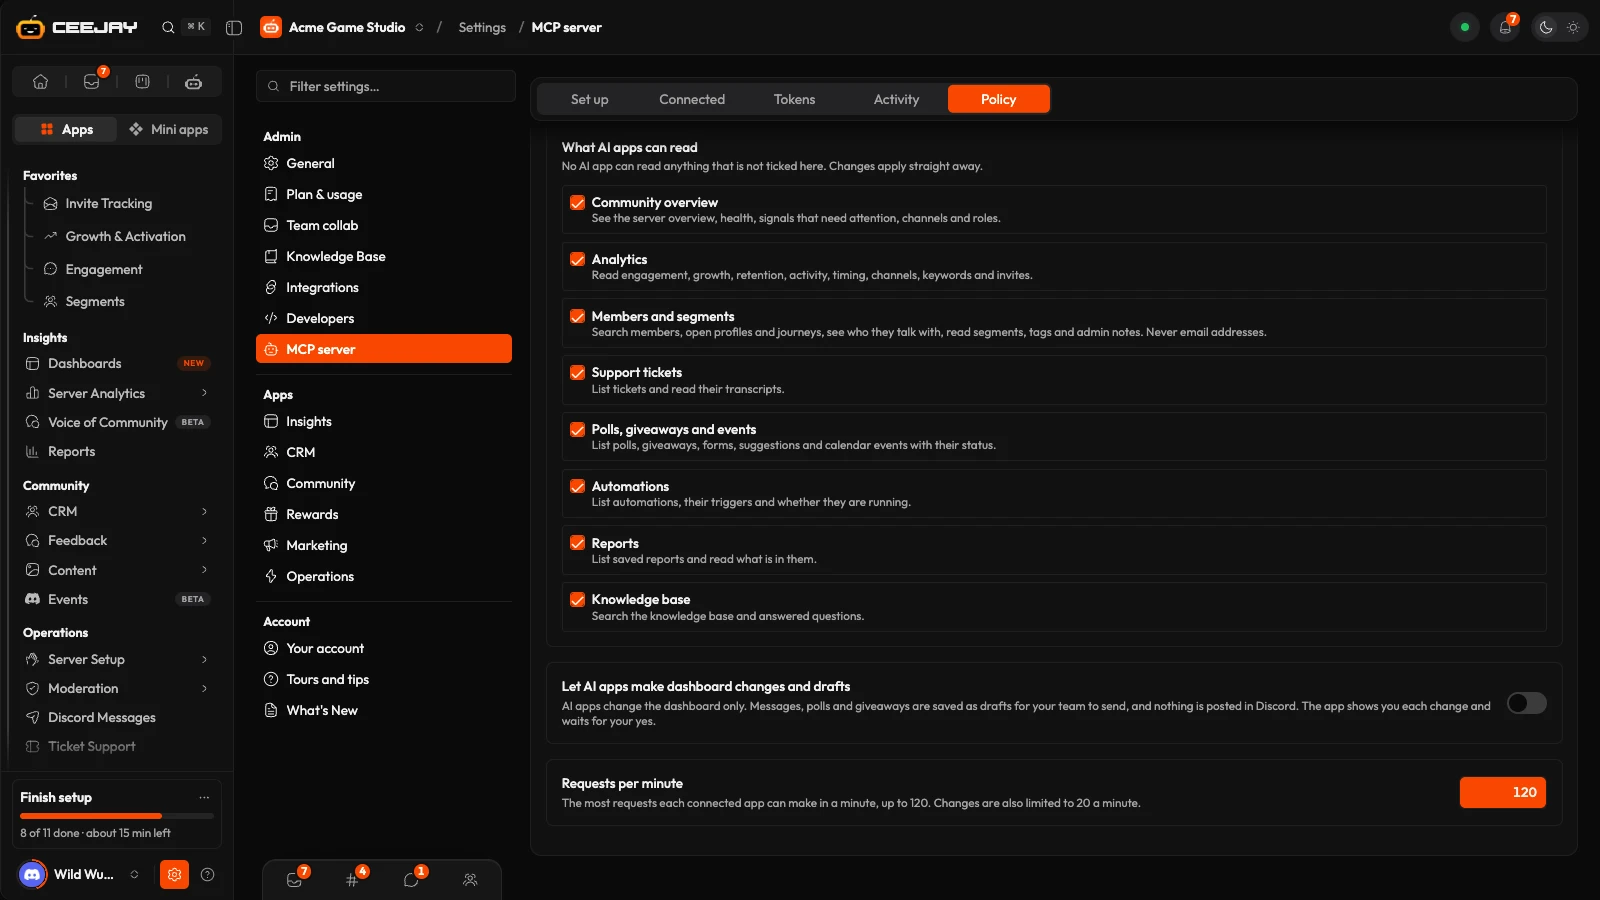
Policy is for server admins. Other team members can see it but not change it. Press Save in the bar that appears at the bottom when you change something, or Reset to undo.
- Allow AI apps: on by default. When it is off, agents cannot read or change anything in this community, even if they are connected, and the Set up tab says so.
- What AI apps can read: the read permissions above. Changes apply straight away.
- Let AI apps make dashboard changes and drafts: the switch described above, with its permissions.
- Requests per minute: the most requests each connected agent can make in a minute, up to 120. Changes are also limited to 20 a minute.
See what agents did
Activity lists the latest 20 calls: the tool the agent used, whether it worked, the agent's name, when, and how long it took. Filter by All calls, Succeeded, Failed or Refused, and press the refresh button for new ones. Most used, last 7 days ranks the tools. A Refused call was not allowed, for example because your policy has that permission off.
To revoke an agent's access, press its bin button on Connected or Tokens. Access ends straight away, without waiting for a token to expire. Switching off Allow AI apps refuses every call.
Whatever an agent reads leaves CEEJAY
Data an agent reads is sent to the AI provider that agent uses. Tick only what you are happy to share, and disconnect agents you no longer use. For the technical detail, see the developer docs.
Good to know
If Set up says AI access is not switched on yet, agents are refused until it is. Ask whoever manages your CEEJAY configuration. A community's Policy always takes precedence: it limits what any agent was approved for.

