

Web Pages
Publish a branded join page with a short sign-up form that collects emails and adds visitors straight to your Discord with a role.
Web Pages is where you build the public landing page for your community. A visitor reads about you, fills in a short form, and joins your Discord server with one button. You design it in the dashboard with a live preview beside it, and publish it when it is ready.
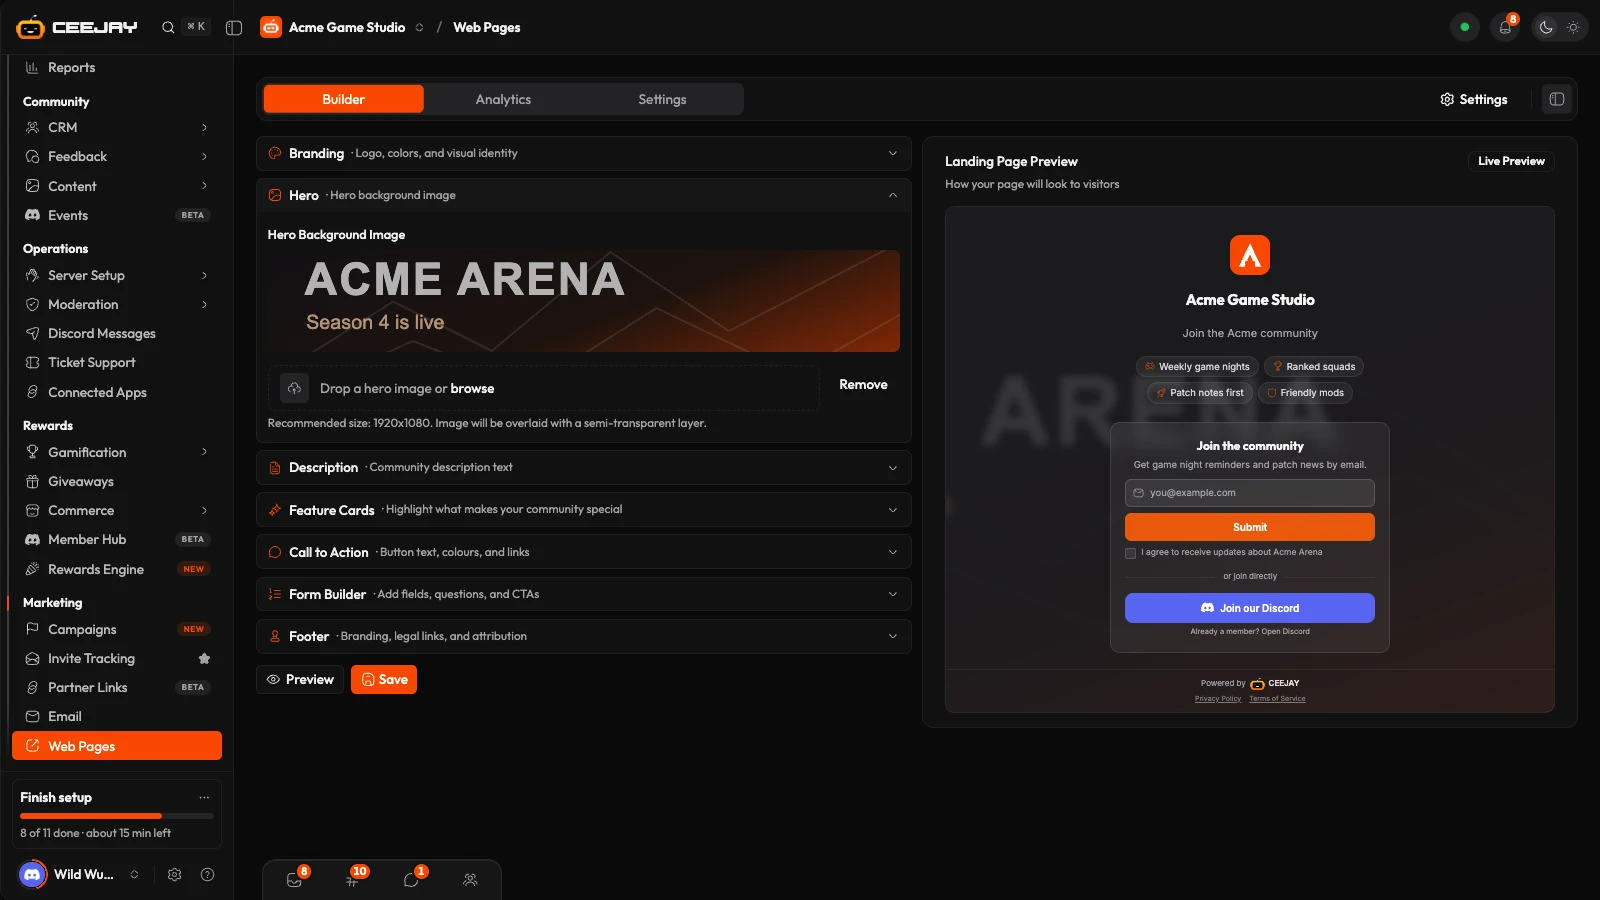
What you see
Go to Marketing → Web Pages. The page has three tabs: Builder, Analytics and Settings. The Builder has your page's sections on the left and a Landing Page Preview on the right, marked Live Preview. Press Save under the sections to keep your changes, and Preview to open the real page in a new tab.
Build the page
Open each section in the Builder and fill it in.
- Branding: your Logo (upload an image of up to 5 MB), Display Name (up to 100 characters), Tagline (up to 200), Primary Color, Background Style (dark, light or gradient, with From and To colours), and the Primary Font for headings and Secondary Font for body text.
- Hero: a Hero Background Image that sits behind the page.
- Description: a paragraph about your community.
- Feature Cards: short highlights, each with an Icon, a title and a description. Press Add Feature Card for each one, up to six. The public page shows the first four.
- Call to Action: the CTA Button Text, the Secondary Text under it, the Discord Button Colour, and Legal Links in Form, which shows your privacy and terms links inside the form.
- Form Builder: the steps a visitor goes through. See below.
- Footer: switch Show "Powered by" on or off for the "Powered by CEEJAY" line, and Show Footer Logo with your own Footer Logo.
The form
Choose a Display Mode: Single Page shows every field at once, and Multi-Step shows one step at a time. Under Add Step, press the type of step you want. Steps appear in the order you list them, and the arrows reorder them.
- Email Capture: a Heading, optional Subtext, Marketing Consent Text for the checkbox under the email box, Required, and Gate Discord Join, which means a visitor must enter their email before they can join on Discord.
- Custom Field: a question with a Label, a Field Type (Short Text, Long Text or Dropdown Select with its Options) and Required.
- Join Discord: the last step, with its own Label. It sends the visitor to Discord.
Social Connect does not link anything yet
The Social Connect step is in the list, but it does not connect to Twitter / X, GitHub or YouTube yet. Pressing its button only ticks the step. Leave it out for now.
Publish it
Open the Settings tab. Each section has its own fields, and Save Settings saves them all.
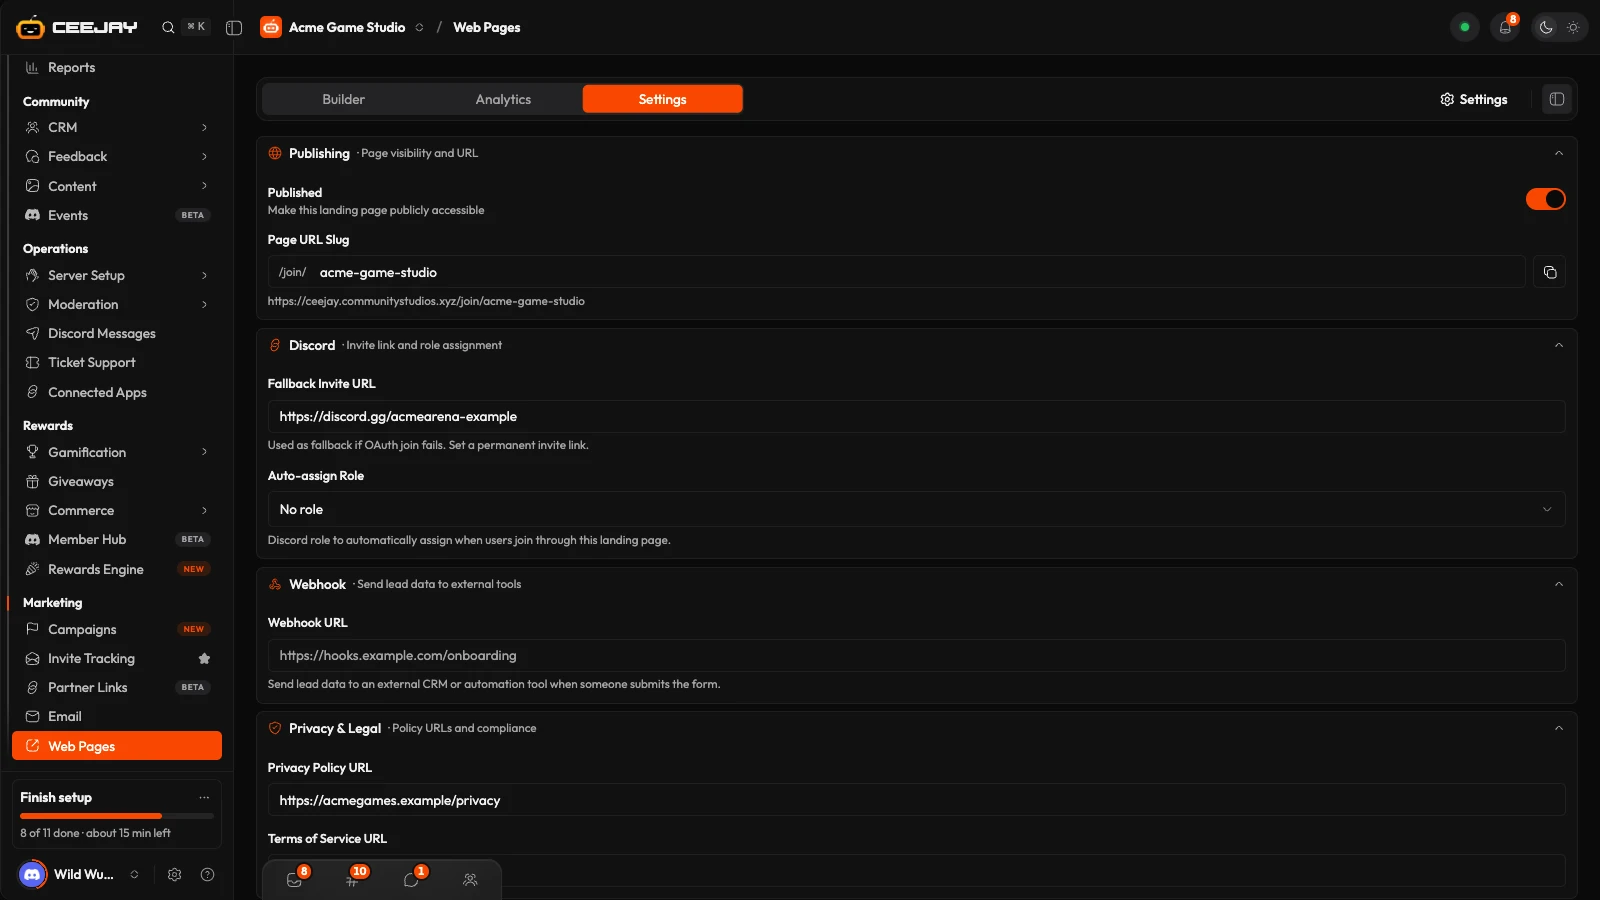
Under Publishing, set the Page URL Slug. It can use lowercase letters, numbers and hyphens, 2 to 50 characters, and must start and end with a letter or a number. The page address is /join/ and your slug on your dashboard's address. CEEJAY shows Taken if another community already uses it. Press the copy button to copy the full address.
Under Discord, pick the Auto-assign Role a visitor gets when they join. Roles that belong to a bot or an integration are greyed out. CEEJAY must be able to give the role, so keep its role above it. If Discord refuses the role, the visitor is still added to the server without it.
Under Privacy & Legal, add your Privacy Policy URL and Terms of Service URL. Under Social Proof, Show Member Count shows how many members your server has.
Switch Published on, and press Save Settings. Until then visitors see "This community page doesn't exist or hasn't been published yet".
What visitors do
A visitor opens your page and completes the form. When they press the Discord button, Discord asks them to sign in and allow CEEJAY to see their Discord name and email address and to add them to your server. CEEJAY then adds them and gives them the Auto-assign Role. If Discord refuses the role, for example because it sits above CEEJAY's role or was deleted, they are still added, without it. A thank-you page follows. If it cannot add them, the page says "We couldn't add you to the Discord server. Please try again, or contact a server admin."
Where the answers go
CEEJAY stores each email address with the visitor's marketing consent, and their answers to your custom fields. The dashboard does not list them. To receive the email addresses, add a Webhook URL under Webhook in the Settings tab. CEEJAY then sends every captured email, the visitor's marketing consent and any campaign tags (utm_source, utm_medium, utm_campaign) from the link the visitor used to open your page, as it comes in. The answers to custom fields are not part of that message. The Webhook URL must be an address of a tool you run, such as your CRM. CEEJAY sends each message once and does not retry failed deliveries, so use an address that is always available. The same person submitting again updates their entry instead of adding a second one, and submissions are limited to 5 per IP address per hour.
The Analytics tab counts the leads your page really captured: Total leads (everyone who left an email), Leads this week against the week before, and Joined the server, with its share of all leads. Page views are not recorded, so there is no conversion rate.
Good to know
Fallback Invite URL under Discord is a permanent invite you can keep on file, but visitors are always added through Discord sign-in, so it is not used when the join fails.

